Entra/Azure AD: Setup SAML
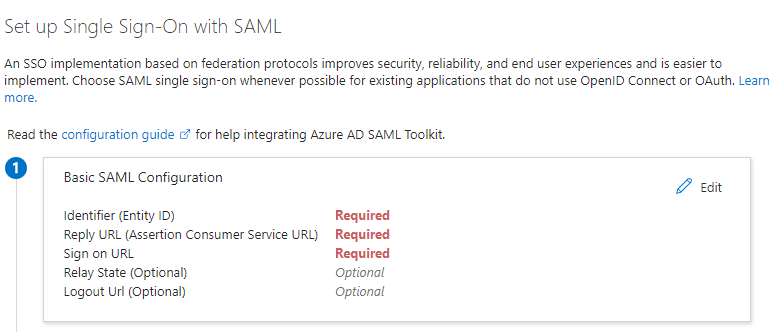
In the basic settings, you should see a section marked Basic SAML Configuration. Press the edit button in the top-right corner of the box.
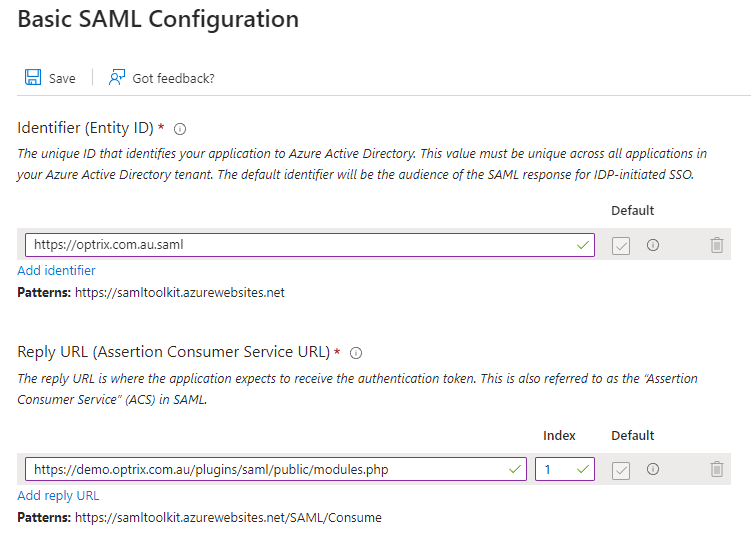
Enter a unique ID for your application (or leave the default value if you don't already have a SAML service), and add a Reply URL.
The reply URL is the URL that appears when you started creating your SAML source in ARDI. Copy and paste the value from the ARDI server to the Reply URL space.
At the same time, copy-and-paste the Entity ID of the server from the AD to the ARDI server.
Next, hit Save and click edit on the next section on the AD server, called Attributes and Claims.
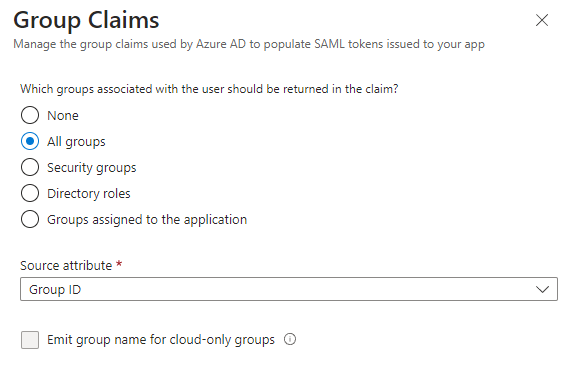
At the top of the page, press Add a Group Claim, then choose your choice of groups (ie, All Groups or Security Groups). We usually suggest using the Group ID, although you can feel free to change this.
Press Save to continue.
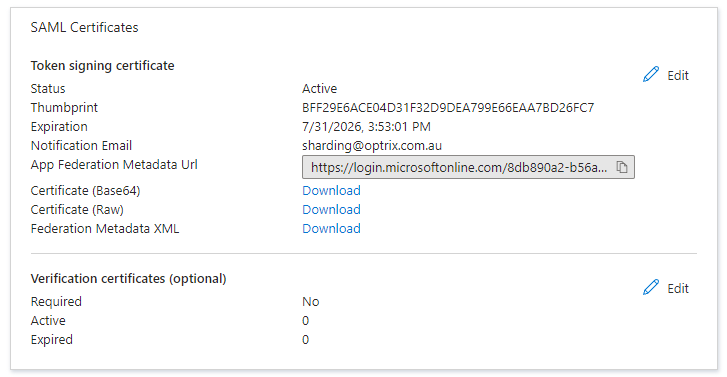
The next box is called SAML Certificates. It contains a Download link next to the words Federation Metadata XML. Download that file to your PC.


