Custom Link Hierarchy
It's possible to create a hierarchy of links in the Single Vision addon that help group your visualisations and destinations into a navigation hierarchy the same way that Location does for your assets.
The process is detailed below…
Step 1: Create a 'Link' Property
In Administration|Properties, create a new URL property called Link. This will store the actual URL the user goes to when they choose one of your options.
Step 2: Create Type Hierarchy
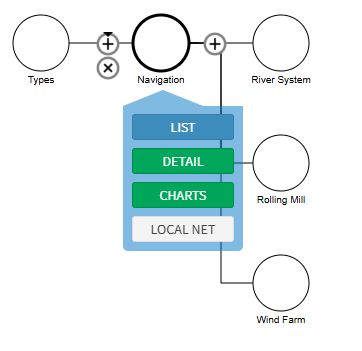
Next, we need to build our hierarchy. Create a type called 'Navigation', and give it the 'Link' property we created in step 1.
Under this type, you'll build your hierarchy of options.
For example, our Small Examples demo site has the following…
This lays out a very simple hierarchy - there are three 'folders' represented by the three types - namely, River System, Rolling Mill and Wind Farm.
Step 3: Create Destination Assets
Lastly, create assets in your ARDI database that represent each of the buttons you'd like your users to be able to press.
Normally these will represent individual visualisations, reports, infographics etc.
Each should be given…
1) The appropriate type you defined in step 1. For example, giving an asset the type 'River System' means that it will appear as a button under the 'River System' menu.
2) The 'Link' property, which contains the URL to the target page.
Other Tricks
Now that you've set up some of your key visualisations as assets, you can also link assets to these visualisations.
Create a new relationship called Visualisation. You can then use this to link your physical assets (ie. pieces of equipment) to the reports and infographics they appear on.
This will automatically add links in their media section that take you directly to each of the key reports, infographics, dashboards and other content that is related to them.
