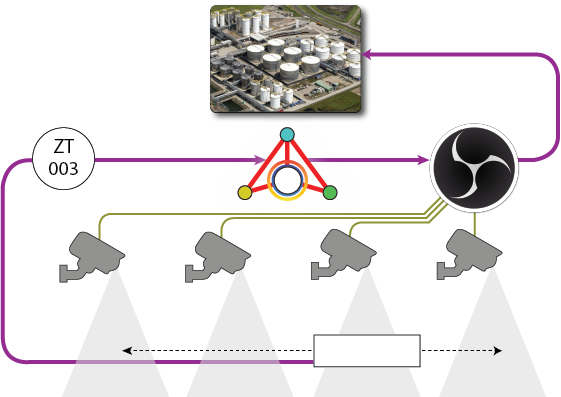
We previously looked at using OBS to create live-data overlays using ARDI. You can also use ARDI to control OBS studio itself, allowing you to switch camera feeds based on live data. You can use this to…
- Track machines or people as they move through your site
- Show the closest camera when alerts or rapid changes in your process are detected
- Switch the camera to the active machines when you have several that move in-and-out of service
- Watch key phases of your work when they occur
How does it work?
We follow a similar setup to our previous article. However, this time we have several different scenes in OBS. These scenes can have different overlays and different camera feeds.
If you are already using an ARDI-powered web overlay, this article will walk you through modifying your file so that it also can change cameras.
If you’re not using a web overlay, you might want to look into doing this Python.
Step 1 – Install & Configure OBS Studio
You’ll need to install OBS Studio and create at least two different scenes.
Depending on which version of OBS Studio you are using, you might need to install the OBS Websocket plugin for OBS Studio.
Step 2 – Download obs-websocket-js
You will want to download the obs-websocket-js Javascript file and save it in the same folder as your HTML file.
If this opens in your browser, you can right-click the page and choose ‘Save As’. We suggest calling it obs-websocket.js.
Step 3 – Update your HTML
In this case, we have four scenes in OBS, each named after one of the cameras (Camera 1, Camera 2, Camera 3 and Camera 4).
We also have a crane that moves 50m, and we’d like to change the camera to always be viewing the cranes current position. The asset named ‘Crane’ has a single property called ‘Position’, which moves between 0-50m.
We want to capture this Position property and use the value to control which scene we view in OBS.
<html>
	<head>
		<title>General Overlay</title>
		<script src="http://localhost/plugins/optrix/hmi.js"></script>
		<script src="http://localhost/plugins/jquery/jquery.min.js"></script>
		<script src="obs-websocket.js"></script>
	</head>
	<body>
		<div>Some Content</div>
		<script>
//Open a new WebSocket Connection
const obs = new OBSWebSocket();
obs.connect({ address: 'localhost:4444', password: '<mypassword>' });

//Handle OBS errors by re-connecting.
obs.on('error', err => {
    console.error('socket error:', err);
    obs.connect({ address: 'localhost:4444', password: '<mypassword>' });
});

//Subscribe to the 'Position' data point, requesting that it isn't animated.
var Connection = new HMIPanel();
Connection.Subscribe("17:22:measurement",function (dta) {
        //Choose the camera based on the value
	var cam = "Camera 1";
	if (dta > 15)
		cam = "Camera 2";
	if (dta > 30)
		cam = "Camera 3";
	if (dta > 40)
		cam = "Camera 4";

	obs.sendCallback('SetCurrentScene', {'scene-name': cam}, function (err,dta)
	{
	});

},true);

//Connect to ARDI
Connection.Connect("localhost/s/wg");
		</script>
	</body>
</html>
So this code…
- Connects to the OBS API
- Subscribes to changes in the Crane Position
- When the crane position changes, the position is checked and the appropriate scene is selected
Note that the code above is illustrative – you’ll need to adjust the password, point address, the logic behind the camera switching and may need some additional tuning and error handling to be production-ready.
What more can I do?
With ARDI, you can do almost anything with your live and historical data. If you’d like to find out more, please contact us.