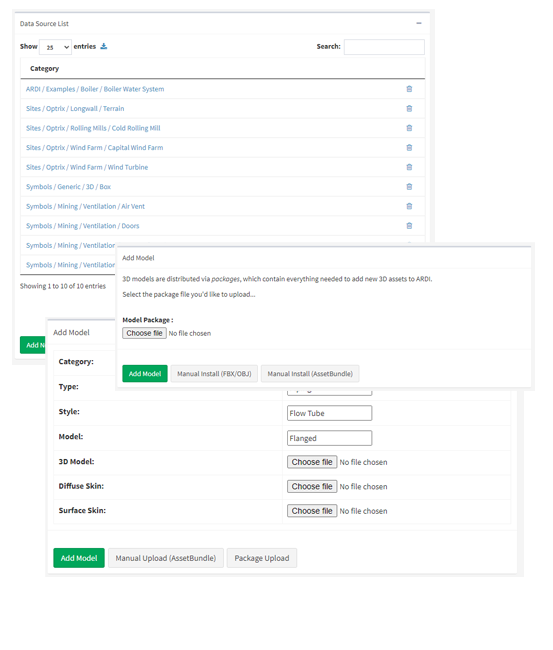
Uploading to ARDI
Login to your ARDI server as an administrator, and follow the steps below.
Step 1:
Go to Administration in the ARDI sidebar, and choose 3D Models from the list of options.
Step 2:
Press Add New Model
Step 3:
Instead of uploading a pre-packaged asset, choose Manual Install (FBX/OBJ)
Step 4:
Drag each of the three files into the appropriate locations.
Step 5:
Choose the four categories to place your 3D model in.
These categories form a hierarchy, from the most generic to the specific name for your model. For example, your categories could be Liquid Transfer / Pipe / Flow Tube / Flanged
Your 3D model should now be available – you can assign it to one of your assets, or ideally one of your asset types.
If you have any questions about the process, please feel free to contact us.